Comprehensive, feature-packed law practice management software
A purpose-built legal practice management solution with built-in accounting – tailored for your practice areas. See us in action!
Meet AbacusLaw:
Delivering a streamlined approach to practice management
![]()
“Comprehensive, feature-packed, complete law practice management. The best thing about AbacusLaw is that it does everything my firm needs – from time and billing to trust accounting, to document management, case and calendar management. AbacusLaw provides tools for every process and workflow in our office. We don’t need any other tools – AbacusLaw runs every aspect of our office.”
Boost productivity (and profits) with easy-to-use legal technology
Shift to a proven system that enables better overall practice management.
AbacusLaw provides your firm with a holistic toolset, from intake to billing and payments, including:
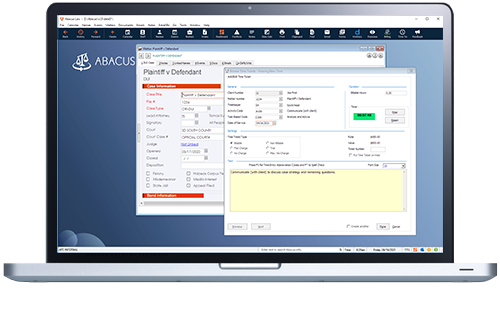
Case intake screens capture well-organized client information and set in motion workflows with accurately prepared legal forms and precise follow-up events. Case status, chronology, deadline, and alert reports enable you to support each case’s upcoming activities.
Managing the financial side of your firm just got easier. With built-in accounting tools, you can generate reports and capture accounts within a few clicks. Trust Accounting even exceeds all Bar Association requirements.
Update your schedule and make your calendar visible to anyone that needs it, including your client. When unexpected situations make changes inevitable, AbacusLaw makes it easy to alert any impacted parties and proceed accordingly. The Microsoft Outlook integration puts powerful organizational tools at your fingertips, enabling efficient client communications.
Intuitive and accurate expense tracking. Automatically generate professional, templated settlement statements calculated automatically to please any affected client.
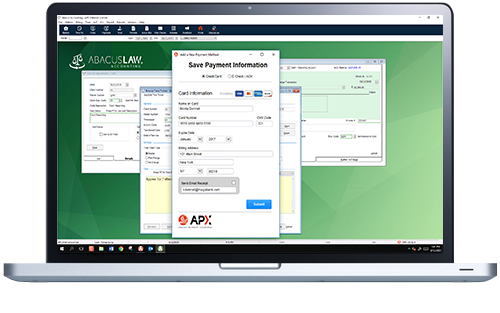
With APX, Abacus Payment Exchange, you can process all types of credit cards, e-Checks, and take payments from Trust & Operating Accounts, with a rapid processing time and a simple fixed rate. APX is PCI Compliant, protecting your clients’ sensitive billing data.
Practice Area Essentials
The best part about AbacusLaw is that it can be easily tailored for whatever practice area(s) your firm focuses on.
Customize reports, input screens, automation rules, documents, special input forms, and specific terminology for your area of expertise.
AbacusLaw helps firms to:
![]()
Centralize Day-to-Day Activities
With a legal case management system, you never have to scramble for information related to your matters again. See all the important details and dates at a glance.
![]()
Maximize Billing Opportunities
Don’t miss out on another billable hour. Between AbacusLaw, the companion mobile app, and Outlook integration, easily track every email, phone call, and client interaction.
Legal Document Automation and State Court Forms
AbacusLaw’s Court Forms solution offers an interface for filling out fields, saving templates and tracking modifications. It also centralizes various documents and forms, allowing for more streamlined documentation processes.
With flexible deployment options, your firm can work from anywhere:
Get anywhere, anytime access to AbacusLaw in a Private Cloud
Opt for a fully managed private cloud virtual desktop solution for increased mobility, security, reliability, and control.
… or deploy AbacusLaw on your own local server for on-site use.
If you still need to have AbacusLaw run from a server in your office, on-premise self-hosted deployment is the option for you.
Products we integrate with